前提
はインストール済み。
Spring Boot
・参考
1,拡張機能のインストール
- Java Extension Pack
- Spring Boot Extension Pack
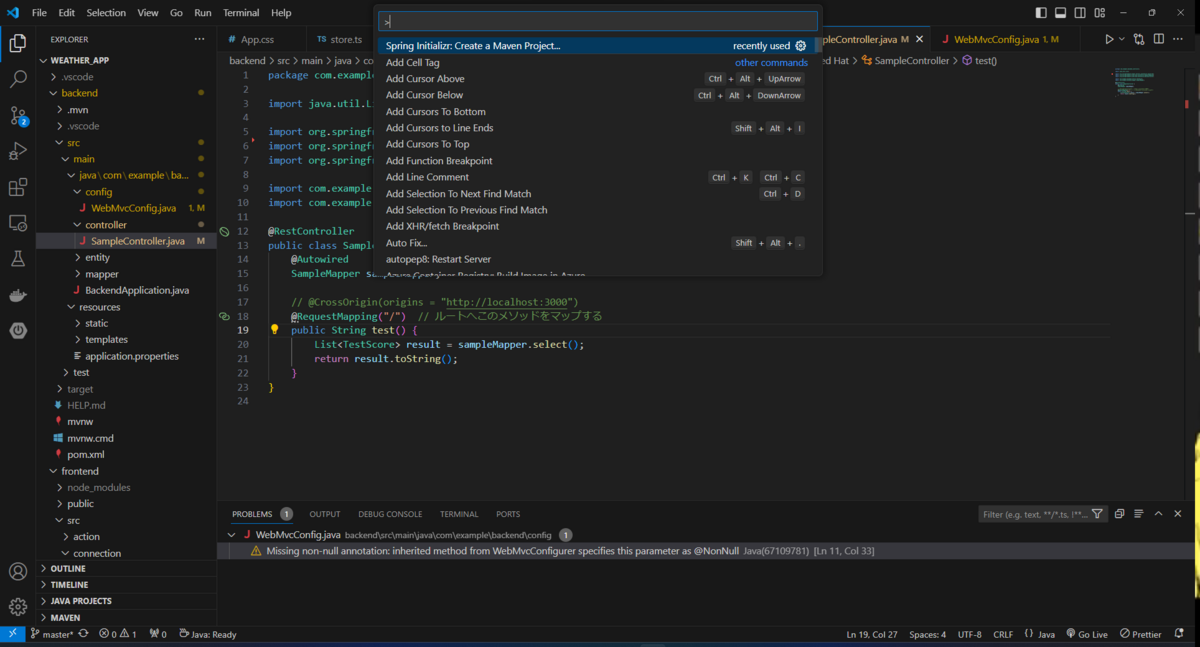
2,Spring Boot新規プロジェクト作成
Ctrl * Shift + P → Spring Initializerで新規プロジェクト作成する。
■追加したDependency
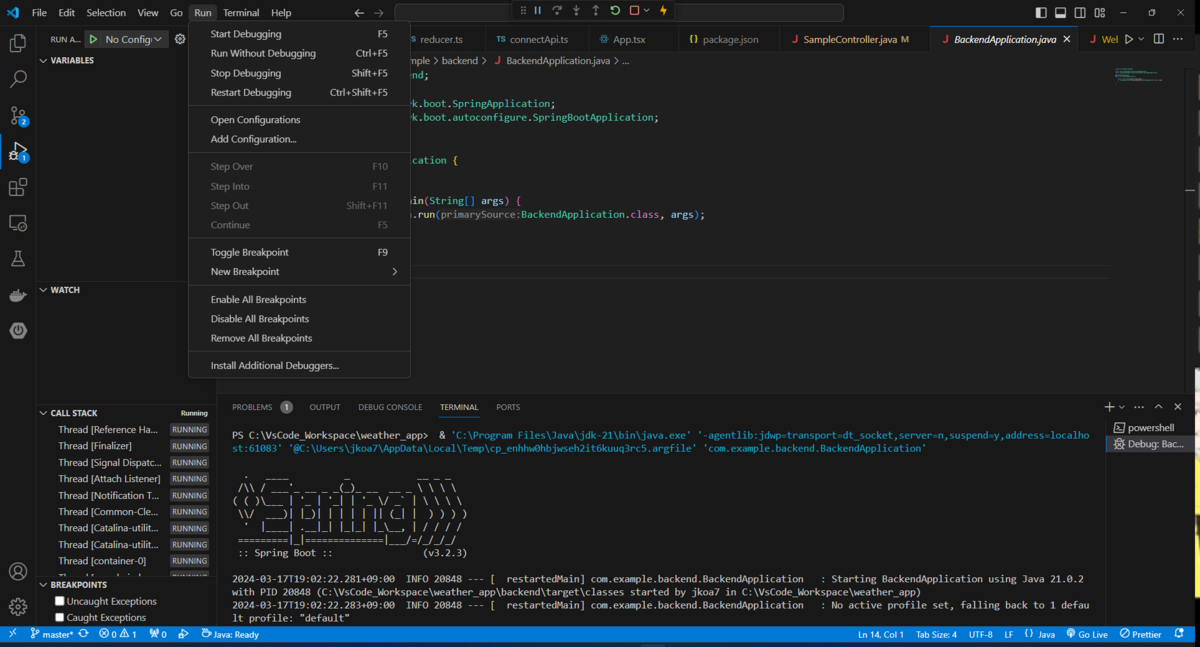
ここまでいったらF5で一旦起動してみる。
3,Hello Worldする
下記のような、Sample Controllerを追加。http://localhost:8080/にアクセスする。
package com.example.backend.controller;

import java.util.List;

import org.springframework.beans.factory.annotation.Autowired;
import org.springframework.web.bind.annotation.RequestMapping;
import org.springframework.web.bind.annotation.RestController;

import com.example.backend.entity.TestScore;
import com.example.backend.mapper.SampleMapper;

@RestController
public class SampleController {
    @Autowired
    SampleMapper sampleMapper;

    // @CrossOrigin(origins = "http://localhost:3000")
    @RequestMapping("/")
    public String test() {
        return "Hello World!";
        // List<TestScore> result = sampleMapper.select();
        // return result.toString();
    }
}
MySQL
・参考
qiita.com
1,pom.xmlにMyBatisを追加
     <dependency>
            <groupId>org.mybatis.spring.boot</groupId>
            <artifactId>mybatis-spring-boot-starter</artifactId>
            <version>3.0.3</version>
        </dependency>
2,application.propertiesを編集
# spring.application.name=backend
spring.datasource.url=jdbc:mysql://localhost:3306/testDB
spring.datasource.username=*****
spring.datasource.password=*****
spring.datasource.driver-class-name=com.mysql.cj.jdbc.Driver
spring.sql.init.mode=always
3,mapper.xml、mapperInterfaceとentityを追加
・xml
<?xml version="1.0" encoding="UTF-8" ?>
<!DOCTYPE mapper
        PUBLIC "-//mybatis.org//DTD Mapper 3.0//EN"
        "http://mybatis.org/dtd/mybatis-3-mapper.dtd">
<mapper namespace="com.example.backend.mapper.SampleMapper">
    <select id="select" resultType="com.example.backend.entity.TestScore">
        SELECT * FROM test.testscore;
    </select>
</mapper>
・Interface
package com.example.backend.mapper;

import java.util.List;

import org.apache.ibatis.annotations.Mapper;
import com.example.backend.entity.TestScore;

@Mapper
public interface SampleMapper {
    List<TestScore> select();
}
・entity
package com.example.backend.entity;

import lombok.Data;

@Data
public class TestScore {
    private int id;
    private int studentid;
    private String subject;
    private int score;
}
4,ControllerでSelect結果を表示
package com.example.backend.controller;

import java.util.List;

import org.springframework.beans.factory.annotation.Autowired;
import org.springframework.web.bind.annotation.RequestMapping;
import org.springframework.web.bind.annotation.RestController;

import com.example.backend.entity.TestScore;
import com.example.backend.mapper.SampleMapper;

@RestController
public class SampleController {
    @Autowired
    SampleMapper sampleMapper;

    // @CrossOrigin(origins = "http://localhost:3000")
    @RequestMapping("/")
    public String test() {
        List<TestScore> result = sampleMapper.select();
        return result.toString();
    }
}
http://localhost:8080。接続成功!
![]()
React
・参考
qiita.com
0,React+Redux+TypeScriptをコマンド1発で作成(今回は使わず)
npx create-react-app my-app --template redux-typescript

cd my-app

npm start //サーバー起動
1,Reac+TypeScriptで新規プロジェクト作成
今回は勉強のため、1発コマンドは使わず、StoreやReducerを自分で書く。
npx create-react-app my-app --template typescript

cd my-app

npm install @reduxjs/toolkit
npm install react-redux
npm install axios //APIとの通信に使うライブラリ

npm start //サーバー起動
起動確認(http://localhost:3000)

ReactからSpring Bootに接続(CORS設定)
・参考
qiita.com
1,App.tsxを編集
import React from 'react';
import logo from './logo.svg';
import './App.css';
import { useEffect } from 'react';
import axios from 'axios';

function App() {
  // Spring Bootに接続(編集点ここだけ)
  useEffect(() => {
    axios.get('http://localhost:8080').then((res) => {
      console.log(res.data);
    });
  })

  return (
    <div className="App">
      <header className="App-header">
        <img src={logo} className="App-logo" alt="logo" />
        <p>
          Edit <code>src/App.tsx</code> and save to reload.
        </p>
        <a
          className="App-link"
          href="https://reactjs.org"
          target="_blank"
          rel="noopener noreferrer"
        >
          Learn React
        </a>
      </header>
      <p>aaa</p>
    </div>
  );
}

export default App;
CORS設定しないとコンソールにエラー出るはず。
Access to XMLHttpRequest at 'http://localhost:8080/' from origin 'http://localhost:3000' has been blocked by CORS policy: No 'Access-Control-Allow-Origin' header is present on the requested resource.

3,CORS設定
・WebConfig.java
アプリケーション全体にCORS設定をするときは、下記のようにaddCorsMappingsをオーバーライドする。
各コントローラー毎にCORS設定する時は@CrossOriginを使う。
package com.example.backend.config;

import org.springframework.context.annotation.Configuration;
import org.springframework.web.servlet.config.annotation.CorsRegistry;
import org.springframework.web.servlet.config.annotation.WebMvcConfigurer;

@Configuration
public class WebMvcConfig implements WebMvcConfigurer {

    @Override
    public void addCorsMappings(CorsRegistry registry) {
        // CORS設定
        registry.addMapping("/**").allowedOrigins("http://localhost:3000");
    }
}
consoleにSelect結果が表示!接続成功!

Redux
APIとの接続をReduxのcreateAsyncThunk使って書き換える。
・Store(store.ts)
まずはStoreを作成。
import { useDispatch, useSelector } from 'react-redux'
import type { TypedUseSelectorHook } from 'react-redux'


//Store生成
const store = configureStore({
    reducer: {
        // ここにReducerを登録する
        sample: sampleSlice.reducer,
    }
});

// TypeScriptの場合は下記をやらずに素のuseSelectorを使うと「does not exist on type ~」エラー出る。
// 参考:https://redux-toolkit.js.org/tutorials/typescript#define-typed-hooks
// 型推論&型エイリアス宣言。
// RootStateという型エイリアスを宣言
// store.getStateでstore自身からStateを取得して型推論。具体的にはsampleSliceのState型になる。
type RootState = ReturnType<typeof store.getState>
type AppDispatch = typeof store.dispatch

// カスタムフック定義&型定義
// 素の `useDispatch`をuseAppDispatchという名前にしてカスタムフック定義、戻り値の型をAppDispatchに定義。
export const useAppDispatch: () => AppDispatch = useDispatch
export const useAppSelector: TypedUseSelectorHook<RootState> = useSelector //「const useAppSelector = useSelector」に型定義TypedUseSelectorHook<RootState>を加えているだけ
export default store;
・Slice&Reducer(reducer.ts)
import { createSlice } from "@reduxjs/toolkit";
import { getRouteApi } from "../connection/connectApi";

export const sampleSlice = createSlice({
    name: 'sample',
    initialState: {
        status: '',
        result: ''
    },
    // ノーマルReducerの登録場所(同期処理)
    reducers: {},
    // extraReducerの登録場所(非同期処理)
    extraReducers: (builder) => {
        builder.addCase(getRouteApi.pending, (state) => {
            state.status = 'Loading';
        })
        .addCase(getRouteApi.fulfilled, (state, action) => {
            state.status = 'Finished';
            state.result = action.payload;
        })
        .addCase(getRouteApi.rejected, (state) => {
            state.status = 'Failed';
        })
    }
})
・createAsyncThunk(connectApi.ts) APIとの接続処理。
import axios from 'axios';
import { createAsyncThunk } from '@reduxjs/toolkit';

const getRouteApiFunc = (): Promise<string> => {
    return axios.get('http://localhost:8080')
    .then((res) => {
        console.log(res.data);
        return res.data;
    })
    .catch((error) => {
        console.log(error);
    })
};

//createAsyncThunk(第1引数:文字列, 第2引数:Promiseを返す非同期関数)
export const getRouteApi = createAsyncThunk(
    'route/getApi',
    getRouteApiFunc
  );
・Child.tsx
Appコンポーネントの子コンポーネント。
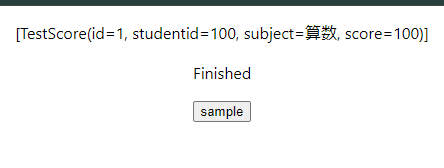
import { useAppDispatch, useAppSelector } from "../store/store";
import { getRouteApi } from '../connection/connectApi';

const Child = () => {
    const status = useAppSelector((state) => state.sample.status);
    const result = useAppSelector((state) => state.sample.result);
    const dispatch = useAppDispatch();

    const getTestScore = () => {
        dispatch(getRouteApi());
    }

    return(
      <>
        <p>{result}</p>
        <p>{status}</p>
        <button onClick={getTestScore}>sample</button>
      </>
    )
  }

export default Child;
・App.tsx
import './App.css';
import { Provider } from "react-redux";
import store from './store/store';
import Child from './component/Child';

function App() {

  return (
    <Provider store={store}>
      <div className="App">
        <Child />
      </div>
    </Provider> // ←これ忘れがち
  );
}

export default App;
sampleボタン押してDBから取得した値が表示されればOK!